OBIEE 11.1.1.6.0 New feature : Auto-Complete Functionality for Prompts
Oracle BI EE 11.1.1.6 provides auto-complete functionality for prompts, which, when enabled, suggests and highlights matching prompt values as the user types in the prompt selection field.
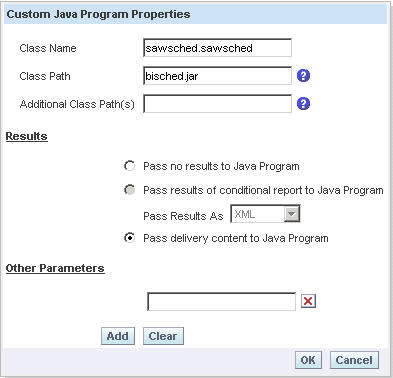
Auto-complete is only available for the Choice List prompt type when the prompt designer selected the “Enable User to Type Value” option in the “New Prompt dialog”.
Note : auto-complete is not available for hierarchical prompts.
The administrator configures the auto-complete functionality to be case-sensitive or case-insensitive, and then specifies the matching level. The matching level determines how Oracle BI EE matches the column’s values to what the user types .
Step-By-Step :
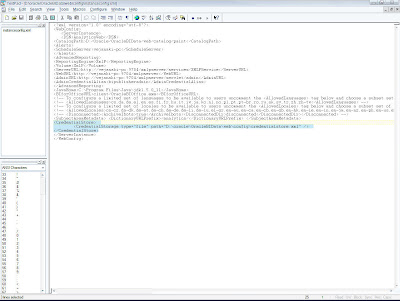
Add the below entry in between <ServerInstance></ServerInstance> tag.
<Prompts>
< MaxDropDownValues>256</MaxDropDownValues>
< AutoApplyDashboardPromptValues>true</AutoApplyDashboardPromptValues>
< AutoSearchPromptDialogBox>true</AutoSearchPromptDialogBox>
< AutoCompletePromptDropDowns>
< SupportAutoComplete>true</SupportAutoComplete>
< CaseInsensitive>true</CaseInsensitive>
< MatchingLevel>MatchAll</MatchingLevel>
< ResultsLimit>50</ResultsLimit>
< /AutoCompletePromptDropDowns>
< /Prompts>
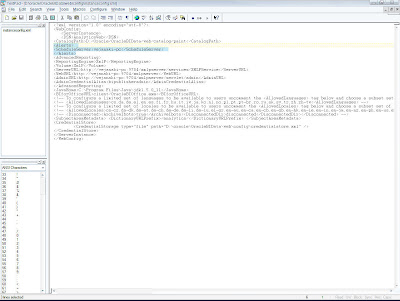
The entry should looks like below screenshot .

Restart the OBIEE 11G Services .
1.1 : Login into Presentation services and create a prompt(In my case I am using “Sample Sales Lite” Subject Area)

Here select ‘User Input as Choice List’ and check ‘Enable user to type values’ .
Click on to preview the prompt .
Type the values in the prompt and you can observe that the prompt suggests and highlights matching prompt values as the user types in the prompt selection field.

If auto-complete is enabled for Oracle BI EE, then the dashboard designer can remove the auto-complete functionality from individual dashboards by setting the Prompts Auto-Complete field to Off in the “Dashboard Properties dialog”.
2.1 :Edit the dashboard and goto Dashboard properties .

2.2: Set Prompts Auto-Complete to Off .

Step3: How to Off Auto-Complete functionality in User Level?
3.1: Goto User -> My Account ( Here in my case user is weblogic )

3.2: Set Prompt Auto Complete to Off and click Ok

Hope this blog helped you.
OBIEE10g Auto Suggest Prompt
Auto-complete is only available for the Choice List prompt type when the prompt designer selected the “Enable User to Type Value” option in the “New Prompt dialog”.
Note : auto-complete is not available for hierarchical prompts.
The administrator configures the auto-complete functionality to be case-sensitive or case-insensitive, and then specifies the matching level. The matching level determines how Oracle BI EE matches the column’s values to what the user types .
Step-By-Step :
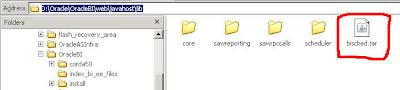
System Setting:Step1 : Navigate to the path <Middleware>\instances\instance1\config\OracleBIPresentationServicesComponent\coreapplication_obips1 and open the instanceconfig.xml file .
Add the below entry in between <ServerInstance></ServerInstance> tag.
<Prompts>
< MaxDropDownValues>256</MaxDropDownValues>
< AutoApplyDashboardPromptValues>true</AutoApplyDashboardPromptValues>
< AutoSearchPromptDialogBox>true</AutoSearchPromptDialogBox>
< AutoCompletePromptDropDowns>
< SupportAutoComplete>true</SupportAutoComplete>
< CaseInsensitive>true</CaseInsensitive>
< MatchingLevel>MatchAll</MatchingLevel>
< ResultsLimit>50</ResultsLimit>
< /AutoCompletePromptDropDowns>
< /Prompts>
The entry should looks like below screenshot .

Restart the OBIEE 11G Services .
1.1 : Login into Presentation services and create a prompt(In my case I am using “Sample Sales Lite” Subject Area)

Here select ‘User Input as Choice List’ and check ‘Enable user to type values’ .
Click on
 to preview the prompt .
Type the values in the prompt and you can observe that the prompt suggests and highlights matching prompt values as the user types in the prompt selection field.

Dashboard Setting:Step2 :How to Off Auto-Complete functionality in Dashboard?
If auto-complete is enabled for Oracle BI EE, then the dashboard designer can remove the auto-complete functionality from individual dashboards by setting the Prompts Auto-Complete field to Off in the “Dashboard Properties dialog”.
2.1 :Edit the dashboard and goto Dashboard properties .

2.2: Set Prompts Auto-Complete to Off .

Step3: How to Off Auto-Complete functionality in User Level?
3.1: Goto User -> My Account ( Here in my case user is weblogic )

3.2: Set Prompt Auto Complete to Off and click Ok

Hope this blog helped you.
OBIEE10g Auto Suggest Prompt
A client asked me if I could create an auto suggest prompt for him. (ie: Google Style Prompt). Basically he wanted an edit box prompt which would fill an suggestion box which he could tab trough to make the right selection.
Since this isn’t a standard 10g functionality I wrote some JavaScript to make it happen. But I didn’t reinvent the wheel ! The people at jQuery already did the bases, I simple adapted it for usage in OBIEE 10g.
1. Download the jQuery UI package here. Install it in your b_mozilla directory’s (or other webserver dirs you use).
2. Download the jQuerySetup from here.
3. Add the setup script to a textbox on your dashboard page:

Alter files locations if needed, don’t forget the Contains HTML Markup checkbox.
4. Add a dropdown prompt to your dashboard page.

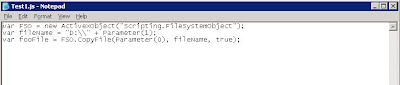
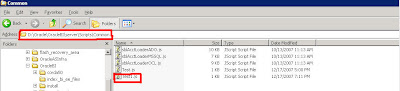
5. Create a javascript file in your b_mozilla directory’s called: autocomplete.js

Thanks,
Satya Ranki Reddy
Since this isn’t a standard 10g functionality I wrote some JavaScript to make it happen. But I didn’t reinvent the wheel
1. Download the jQuery UI package here. Install it in your b_mozilla directory’s (or other webserver dirs you use).
2. Download the jQuerySetup from here.
3. Add the setup script to a textbox on your dashboard page:

Alter files locations if needed, don’t forget the Contains HTML Markup checkbox.
4. Add a dropdown prompt to your dashboard page.
5. Create a javascript file in your b_mozilla directory’s called: autocomplete.js
function SetAutoComplete(PromptColumn){6. After the dropdown prompt add a textbox with:
var domNode = document;
var tagName = '*';
var tags = domNode.getElementsByTagName(tagName);
var y ="";
for(i=0; i<tags.length; i++){
if (tags[i].className == 'GFPFilter') {
if (tags[i].getAttribute('gfpbuilder').indexOf(PromptColumn) != -1)
{
y = tags[i].getAttribute('sid')
};
$(
function()
{
$( "#"+y ).combobox();
});
};
};
};
<script src="res/b_mozilla/autocomplete.js" language="javascript"> </script>7. Add your report and run the dashboard:
<script language="javascript">
SetAutoComplete('C1 Cust Name');
</script>

Thanks,
Satya Ranki Reddy